


博客已迁移到 Astro + Firefly,旧文章正在陆续搬家中。
github 加速访问——Python 代码自动化实现
513 字
3 分钟
github 加速访问——Python 代码自动化实现
Python 代码实现
使用代码前可能要修改 hosts 的权限。如果是 windows 直接运行代码就可以了.
import reimport requestsimport os
#1.若hosts中本身配置过就删除掉原来配置的。 地址是windows默认存放hosts的位置with open("C:\Windows\System32\drivers\etc\hosts","r",encoding="utf-8") as f: lines = f.readlines() #print(lines)with open("C:\Windows\System32\drivers\etc\hosts","w",encoding="utf-8") as f_w: for line in lines: #删除包括github.com的那一行内容 if "github.com" in line: continue #和上面的同理 if "github.global.ssl.fastly.net" in line: continue f_w.write(line)
#2.获取域名对应的ip地址#二级域名SecondLevelDomain = "github.com"url1 = "https://{SecondLevelDomain}.ipaddress.com/".format(SecondLevelDomain=SecondLevelDomain)#次级域名SubDomain = "assets-cdn.github.com"url2 = "https://{SecondLevelDomain}.ipaddress.com/{SubDomain}".format(SecondLevelDomain=SecondLevelDomain, SubDomain=SubDomain)#大概是给github搞加速的厂商的域名fastly.neturl3 = "https://fastly.net.ipaddress.com/github.global.ssl.fastly.net"
#请求链接r1 = requests.get(url1)r1.status_coder1.encoding = 'utf-8'#获取响应体r1=r1.text# print(r1)pattern = re.compile('https://www.ipaddress.com/ipv4/[0-9]*.[0-9]*.[0-9]*.[0-9]*')#https://www.ipaddress.com/ipv4/140.82.113.4res = pattern.findall(r1)res = res[0].split("/ipv4/");#切片res1 = res[1];#获取到ip地址res1 = res1+" github.com"print(res1)
r2 = requests.get(url2)r2.encoding = 'utf-8'#获取响应体r2=r2.text# print(r2)pattern = re.compile('https://www.ipaddress.com/ipv4/[0-9]*.[0-9]*.[0-9]*.[0-9]*')#https://www.ipaddress.com/ipv4/140.82.113.4res = pattern.findall(r2)res = res[0].split("/ipv4/");#切片res2 = res[1];#获取到ip地址res2 = res2+" assets-cdn.github.com"print(res2)
r3 = requests.get(url3)r3.encoding = 'utf-8'#获取响应体r3=r3.text# print(r3)pattern = re.compile('https://www.ipaddress.com/ipv4/[0-9]*.[0-9]*.[0-9]*.[0-9]*')#https://www.ipaddress.com/ipv4/140.82.113.4res = pattern.findall(r3)res = res[0].split("/ipv4/");#切片res3 = res[1];#获取到ip地址res3 = res3+" github.global.ssl.fastly.net"print(res3)
#3.写入hosts文件f=open("C:\Windows\System32\drivers\etc\hosts","a")f.write(res1+"\n");f.write(res2+"\n");f.write(res3+"\n");f.close();
#4.刷新DNS缓存os.system("ipconfig /flushdns")下面是原本需要的操作。上面的操作是基于下面的理论的。
1. 获取 GitHub 官方 CDN 地址
打开后界面:
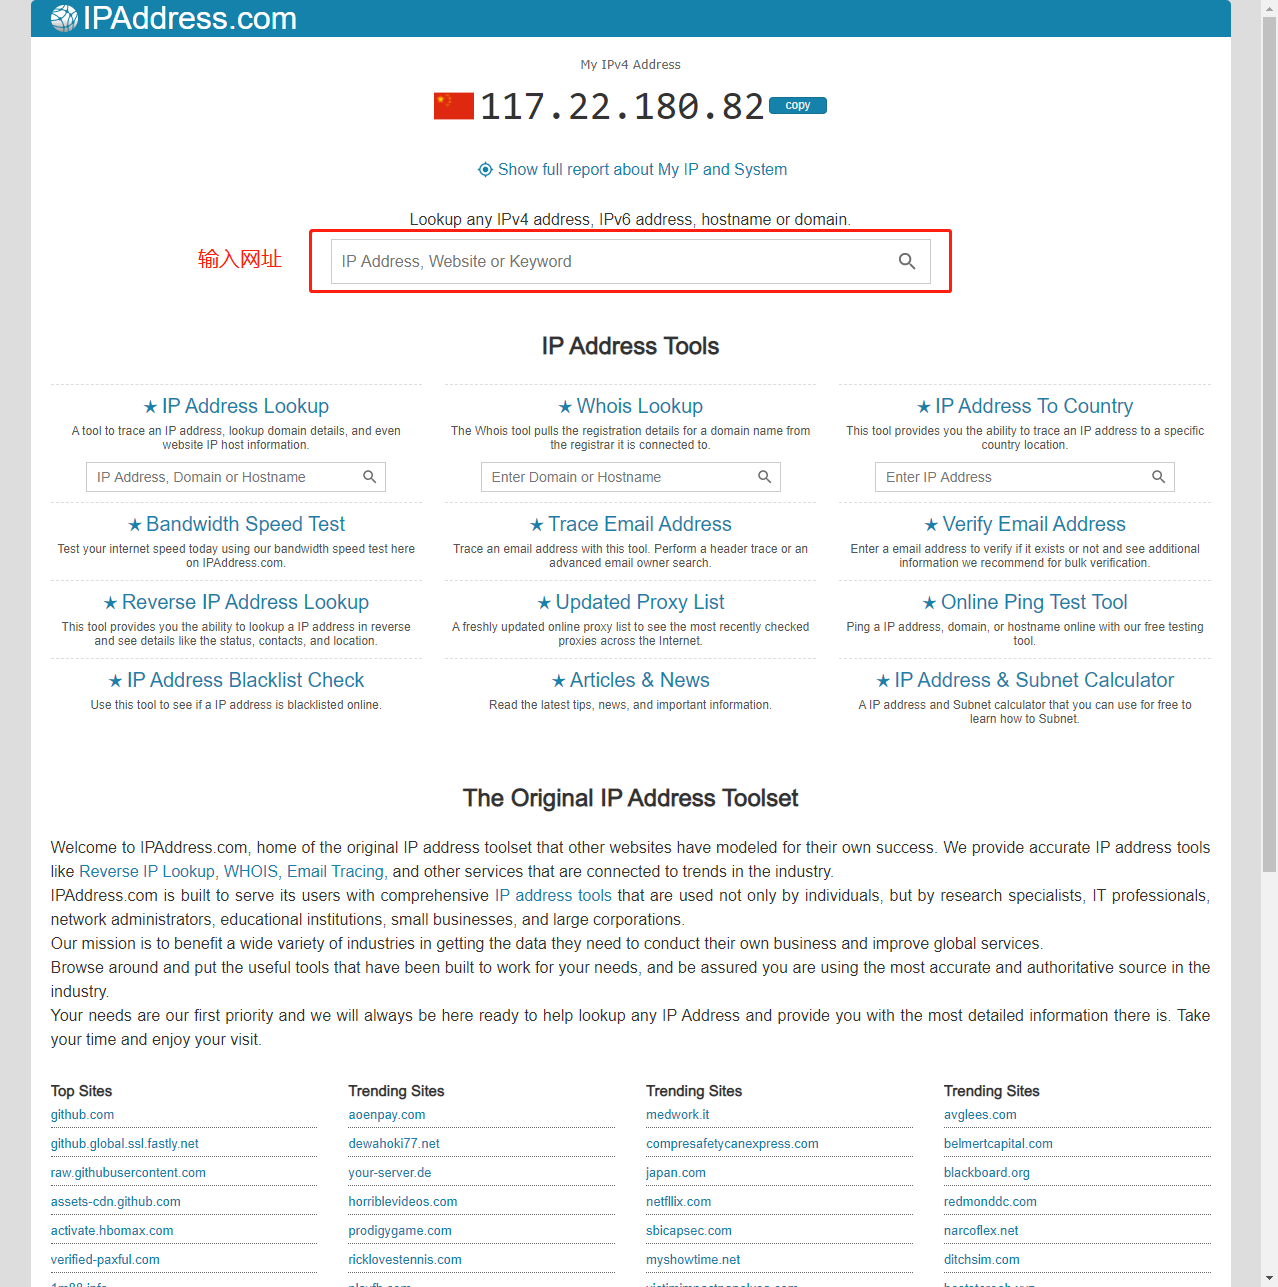
2. 进入后查询这三个链接的 DNS 解析地址,并记录下,后面有用
①:github.com
②:assets-cdn.github.com
③:github.global.ssl.fastly.net
分别输入上面是三个地址,以 github.com 为例
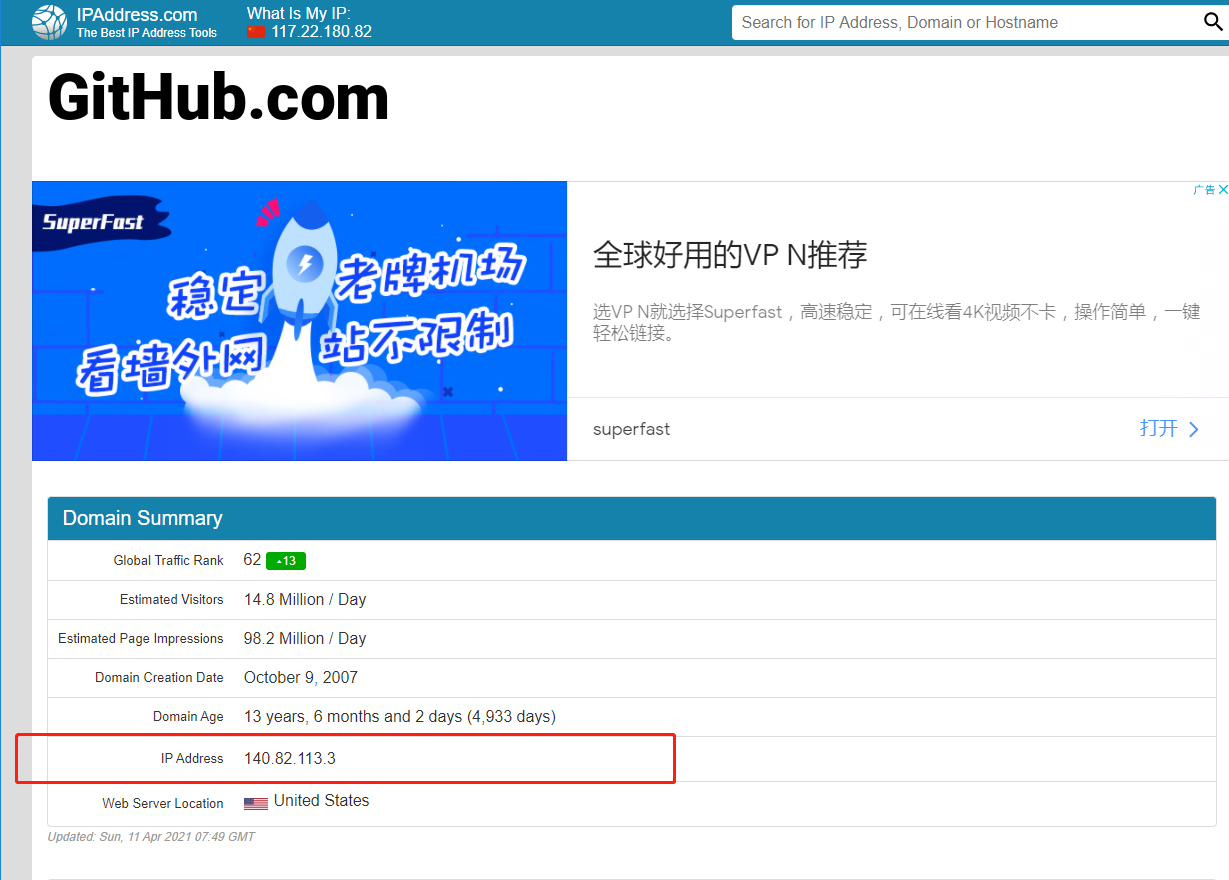
3. 修改系统 Hosts 文件
打开系统 hosts 文件(需管理员权限)。 路径:C:\Windows\System32\drivers\etc
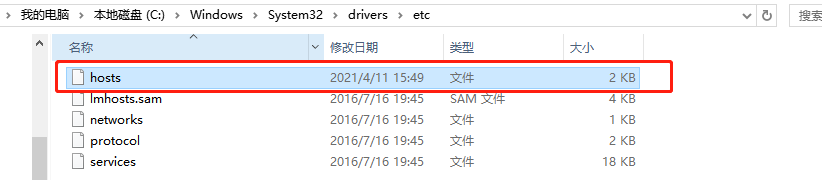
在末尾添加三行记录并保存。(需管理员权限,注意 IP 地址与域名间需留有空格)

4. 刷新系统 DNS 缓存
Windows+X 打开系统命令行(管理员身份)或 powershell
运行
ipconfig /flushdns手动刷新系统 DNS 缓存。
到这里所有工作完毕,可以直接访问了,发现访问速度很快!
文章分享
如果这篇文章对你有帮助,欢迎分享给更多人!
github 加速访问——Python 代码自动化实现
https://an2333.com/posts/archive/github访问加速/相关文章智能推荐
1
K8s 核心概念图解:从一家汉堡店开始
随笔一份可交互的 Kubernetes 入门图解:集群、Pod、工作负载、Service、Ingress、Helm、镜像仓库,点一点就能看懂请求怎么流转。
2
jenkins自动化部署Vuepress(下)-新建任务以及任务配置
工具与环境在 Jenkins 中新建任务,配置源码管理、SSH 密钥和构建步骤,实现 push 后自动部署。
3
jenkins自动化部署Vuepress(上)-安装jenkins和基本配置
工具与环境将Vuepress,也就是本网站的文件,放在github的私有仓库里,每当从vscode中把文章代码什么的push到私有仓库的时候,jenkins服务器自动将更…
4
MacM1 常用环境搭建
工具与环境在 M1 Mac 上搭建常用开发环境:JDK、Maven、MySQL、Homebrew、Node、Python。
5
“<”运算符是为将来使用而保留的。报错解决方法
工具与环境在 VScode 下运行犀牛书第一章的一个词频统计代码出现的报错
随机文章随机推荐